
Molds made of fiberglass are preferred by modelers and spare parts makers because this material is very affordable, easy to work with, and very durable. In this article, I’ll describe how you can make a fiberglass mold from an existing part with a few simple steps.
Here are the 9 steps to make fiberglass molding from an existing spare part:
- Clean the Part
- Mount the Part on a Clean Backing Board
- Fill Any Gaps
- Apply Mold Release Wax
- Start Building the Fiberglass Mold
- Wait for the Gelcoat to Cure
- Apply Polyester Resin Over the First Coat
- Allow the First Layer to Cure
- Apply the Next Layer
The most common adhesive used in gluing fiberglass plies from each other is polyester resin or boat resin. Boatbuilders commonly use this resin because it is the cheapest option for fiberglass reinforcements for new boat constructions.
Read on to learn more about making a fiberglass mold out of an existing part, the materials required, and the steps involved.
How to Make a Fiberglass Mold from an Existing Part
If you want to make a copy of an existing part of a boat, a car, or a machine, you can make a fiberglass mold out of it. This is the best way to replace a broken part of a boat that you can’t find in any spare parts store or a part of a machine that is already out of production.
The basic steps required to do this are cleaning the part, layering plies of fiberglass on it, and using adhesive to force it to conform to the existing part’s shape. After the fiberglass plies have taken the outer shape and the whole thing has set, they are peeled off from the plug. You can now use this mold to make a copy of the broken existing part.
The existing part must be clean before the fiberglass plies are applied to it. You should also apply release wax several times. This wax will prevent the fiberglass materials from bonding with the surface of the existing part.
Layering should be done incrementally so that the fiberglass will not heat up and warp. Resin or adhesive is applied to each fiberglass mat layer. When enough fiberglass layers reach the mold’s preferred thickness, the whole unit is allowed to set or cure. The most commonly used adhesive in fiberglass mold production for boat parts is polyester resin.
Steps in Making Fiberglass Molds from an Existing Part
Since you already have an existing part, you already have a plug. You don’t need to perform the first step in making a fiberglass mold to make a plug. A plug is basically a representation of the final object that you want to produce.
The existing part you want to use as a mold is actually the ‘final’ object and not just a representation. Before starting this project, prepare the following materials:
- The existing part
- Appropriate backing board
- Clamping materials, hot glue, or whatever is available and appropriate
- Mold release wax or PVA
- Gelcoat
- Polyester resin
- Fiberglass cloth or mat
Here are the steps on how to make fiberglass molding from an existing spare part.
1. Clean the Part
Ensure that there are no dents or unnecessary buildups on the surface. The surface of the part must be relatively smooth. You should correct all surface imperfections, or they will reflect on the final mold formation.
2. Mount the Part on a Clean Backing Board
Use whatever means available to secure the part on the mounting board. You can use hot glue since it hardens quickly and yet can be easily removed. But you can’t use hot glue if you will be curing the mold under high temperatures. In such a case, you need to use some form of the clamping system.
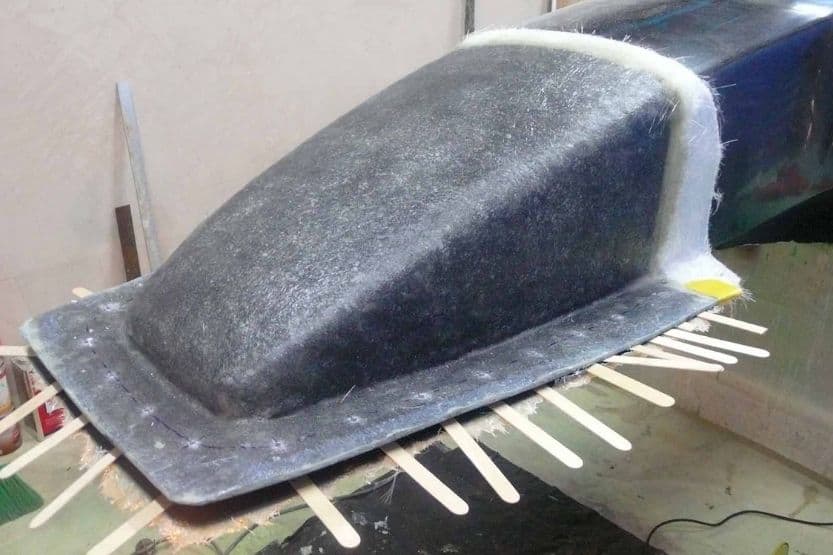
3. Fill Any Gaps
As soon as the part is securely mounted on the backing board, fill any gaps or transitions between the board and the part so that the part and the fillers will act as one unit. You can use foam or Styrofoam and shape them according to the gaps’ shapes and then insert them onto these gaps.
Remember that the backing board’s surface quality and the existing part will be reflected or assumed by the gel coat of the fiberglass mold. If there are imperfections, they will get worse and not better.
So, before you proceed, make the necessary corrections on the backing board and the existing part so that you will obtain the surface finish that you want your final fiberglass mold to have.
4. Apply Mold Release Wax
Once you are satisfied with the surface finish of the unit, apply mold release wax. Professional mold makers recommend using paste wax and PVA (polyvinyl alcohol) as the best mold releasing agents. This wax will form a physical barrier between the existing part and the fiberglass mold’s gel coat. It will also provide an extra layer of protection to the existing part that you are using as a plug.
5. Start Building the Fiberglass Mold
You can now start building the fiberglass mold.
Apply the gel coat over the surface of the existing part. You can use a spray gun for easier application. You should make sure that the gel coat thickness is about 20 mils wet or 0.02 inch over the plug’s surface.
6. Wait for the Gelcoat to Cure
Give time for the gel coat to cure. Only proceed to the next step if it is already firm but still tacky to the touch. Then, apply one layer of fiberglass cloth or mat over the entire surface of the existing part.
7. Apply Polyester Resin Over the First Coat
Apply polyester resin over the first coat. Ensure that there are no air bubbles left on the fiberglass cloth. It should be completely void-free. Use a bubble roller to remove the air pockets by moving it over the plug’s entire surface.
8. Allow the First Layer to Cure
Allow the first layer to cure fully before applying the second layer of fiberglass cloth. This will reduce the chances of surface distortions.
9. Apply the Next Layer
After the first layer has fully cured, apply the next layer and the next one, one at a time, until you have obtained the desired thickness of the mold. You can also do a wet-on-wet process when you have reached these parts of the mold-making process if you want to finish the mold faster. Just be sure to apply the polyester resin between each layer and remove all the trapped air from a layer before applying the next layer.
Here is a layering tip that will help you produce a good fiberglass mold: you may need to apply 2 to 3 layers of fiberglass mat or cloth until you obtain the mold’s desired thickness.
If you are building a small mold and using the 1.5 oz fiberglass mat, you want your mold to be .38 inches thick. You may need to apply 9 to 10 layers. But if it is a larger mold, it will be more practical to add core materials to get the mold’s desired thickness level.
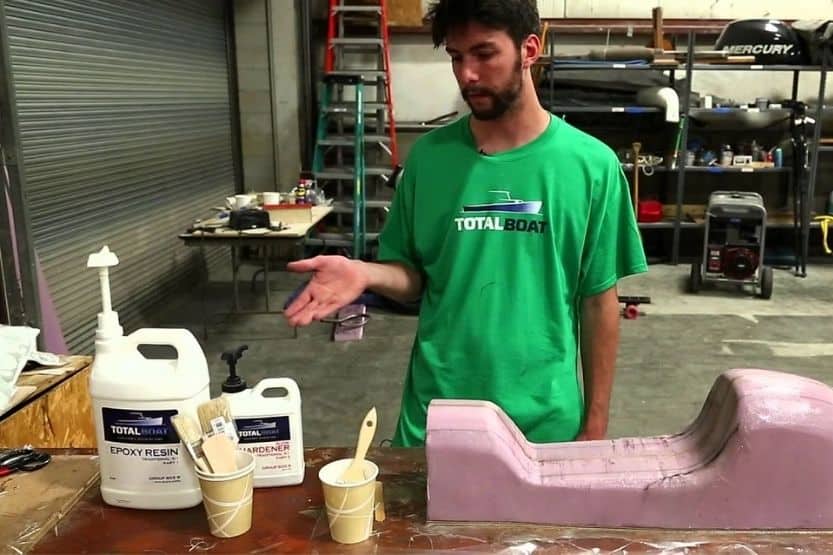
Videos of Fiberglass Mold Making
To help you better appreciate the process of building fiberglass molds, here are two videos that show how to make a fiberglass mold. The videos are in two parts, the first video shows the initial steps, and the second video shows the final steps leading to the release of the mold from the plug:
Additional Tips to Properly Make a Fiberglass Mold From Existing Parts
Here are some useful tips on making fiberglass molds from existing parts. These tips will ensure that there will be little or no surface imperfections on the molds that you will build:
1. Ensure that the Plug Is Absolutely Free from Dust and Dirt
You should thoroughly clean the plug’s surface to the point that there’s no trace of single dust or dirt. When present, you might trap them underneath the wax coat.
The waxed surface will be the final surface finish that you will see in the mold after release from the plug. If there are any specks of dust and dirt trapped underneath the release wax, they will become an integral part of the mold. Every time you use the mold, their unwanted ‘footprints’ will be visible in the formed parts.
2. Mold Release Wax Application
To get the best result, waxing should be done several times. That means the release wax should not only be applied to the surface of the plug just once. The number of times depends on the surface of the plug.
If the surface is very porous, you should apply multiple coats of release wax. These coats should be sufficient enough to cover the tiny pores and imperfections on the plug’s surface. It is better to err on the plus side rather than the minus side.
If these tiny holes and imperfections are not covered, the resin will lock into them. It may be difficult to release the final fiberglass mold from the plug.
3. Curing Time Is Not Very Critical
The curing time between each layer is not very critical. Just as long as you give the resin sufficient time to set, they can still be tacky and not yet completely cured. If you work in a room with 70 °F (21 °C) temperature, you can work on each fiberglass layer somewhere between 30 minutes and a couple of hours. This depends on the resin mixture you are using.
4. Layering to Increase the Thickness of the Mold
You can enhance the integrity of the mold by increasing its thickness. If you are building a large fiberglass mold, you can add core materials in addition to the fiberglass mats. Some good options are chopped strand mat or Aeromat.
You need to cut these core materials into shapes and sizes that will fit certain mold parts. The core materials are especially applicable to sections of the plug or existing part that is generally flat and large. These mats are applied and epoxied in the same way you do with the fiberglass mats.
5. Trimming the Final Fiberglass Mold
When the fiberglass layers are completely cured, you can release the mold from the plug or the existing part. To make this step easier to perform, use a Dremel tool that has a reinforced cut-off wheel. Using this tool will trimming away all the rough edges of the mold easier and faster.
6. Releasing the Mold from the Plug
Suppose you want an easier way to release the final mold from the plug. Use a model knife. Insert the knife into one corner of the backing board. Then work the blade around the perimeter while gently twisting it. This action will help release the mold from the plug.
Now that you know how to make fiberglass molds from existing parts, let’s look at the cost of making a fiberglass mold.
Cost to Make a Fiberglass Mold
The cost of making a fiberglass mold will depend on the size of the mold. On average, the companies that make fiberglass molds will charge somewhere between $1,500 and $12,000 as their starting rates for molds made from fiberglass.
In producing molds, most of these companies are using injection molding machines. Most of these machines are powered by hydraulic systems. The prices of these machines range from $2,200 to $20,000.

As a matter of interest, to build a boat mold for an open commercial boat design, a mold manufacturer will usually charge around $2,000 per foot. The cost rises to $2,800 per linear foot for high glass boat molds with a boat width of 8 feet.
The time it will take to build the boat mold made of fiberglass could be up to 8 months. Accessory molds such as the deck are also included in the price.
Conclusion: How to Make a Fiberglass Molding from an Existing Part
The first step in making a fiberglass mode out of an existing part is to clean that part very well. Then you need to apply several layers of release wax to it. After that, apply fiberglass one ply or layer at a time so that they won’t heat up and warp while drying. Apply polyester resin on every layer of fiberglass.
Keep adding more fiberglass layers and adhesive until enough thickness is achieved. This will bond all the layers together and make them strong, so they will act like they are one single unit. After the resin has cured and the fiberglass mold appears to be one single body, carefully peel it off the plug or the existing part.
![Read more about the article How Much Is Boat Insurance? [10 Cost Factors]](https://boatinggeeks.com/wp-content/uploads/2020/10/how-much-is-boat-insurance-300x200.png)